This tutorial will guide you through changing label rolls and transfer rolls for your Zebra TLP-2824 Plus printer.
Recommended supplies:
Labels: from Onlinelabels.com, product RL987TW – 1″ x 1″ Thermal Roll Labels – 1″ Core / 4″ Outer Diameter. See them here.
Thermal transfer roll: It is a high performance resin transfer resin roll, Zebra 5095. You can buy it here.
Steps:
1. Open the printer by pulling forwards on the two tabs located near the front. This releases the lid to open.
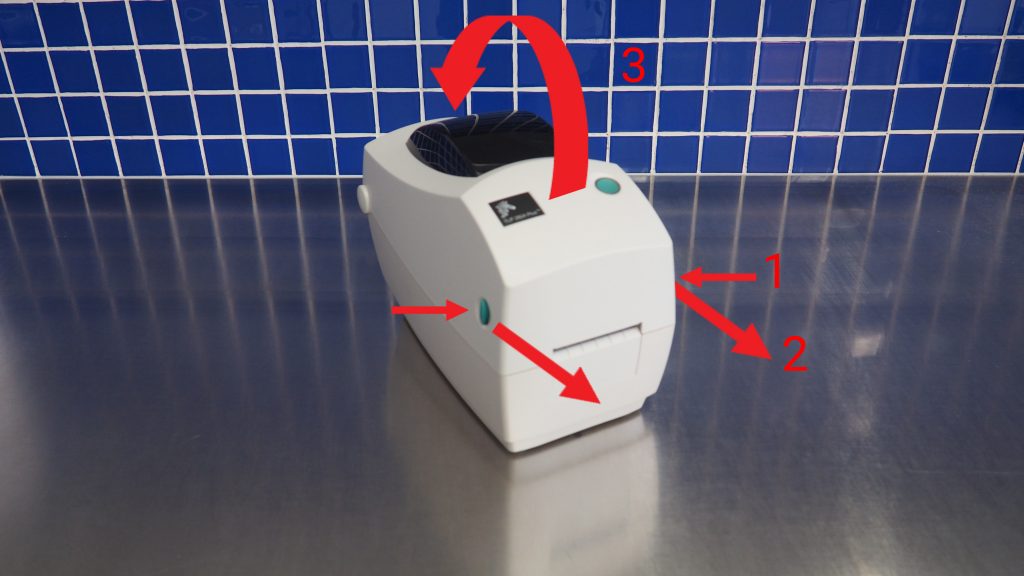
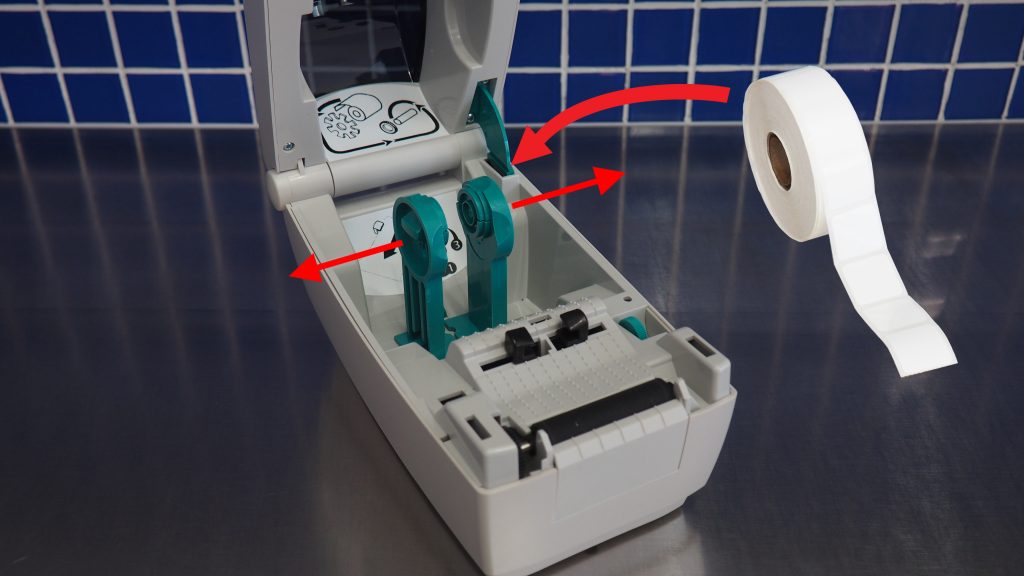
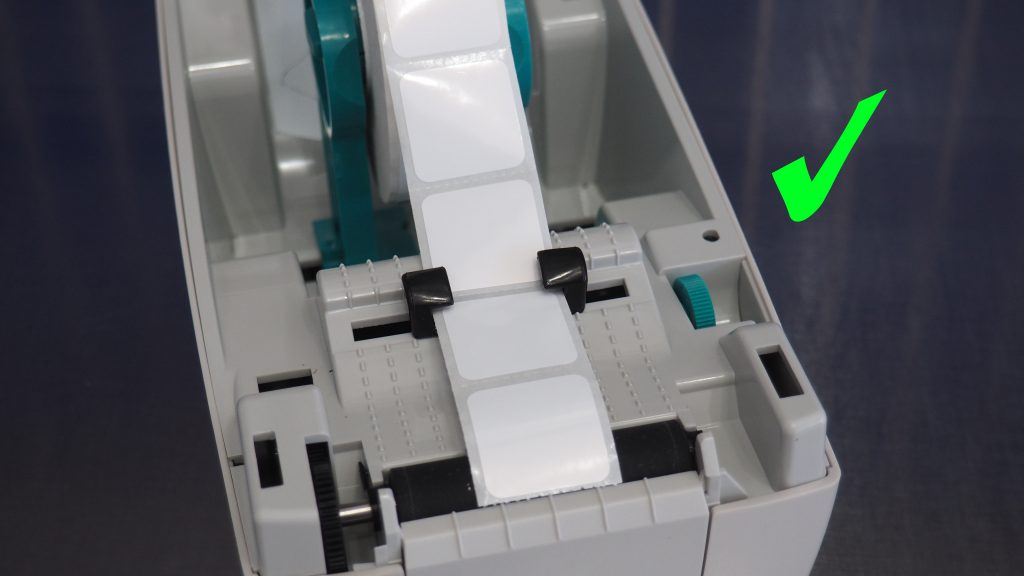
2. To place a roll of labels, use your fingers to spread the green prongs and insert the roll label-side-up.
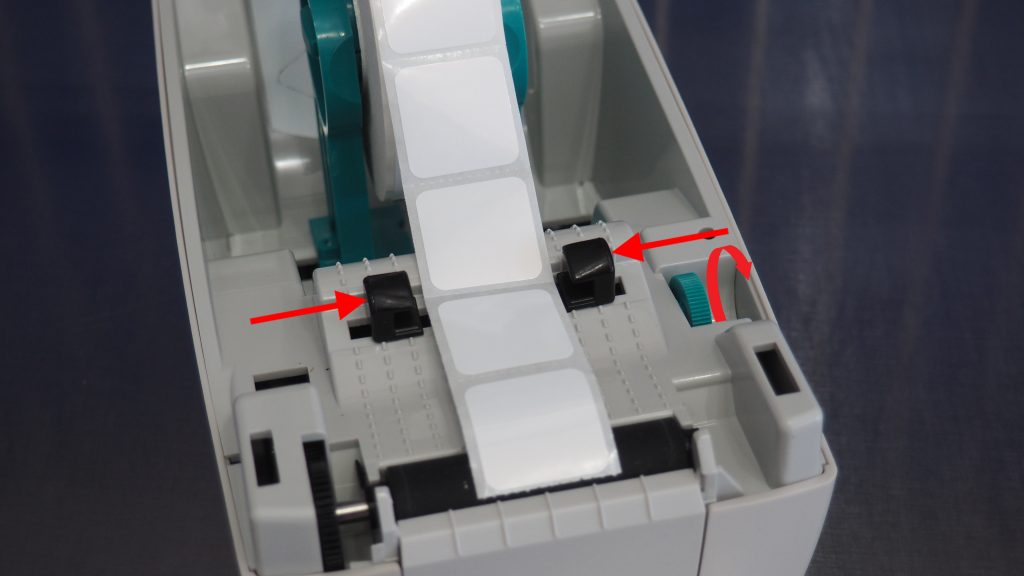
3. To align the labels, there is a thumbwheel on the right. Roll it towards you to pinch the label strip. Adjust it until all the wiggle room is out, but not until the strip is pinched.
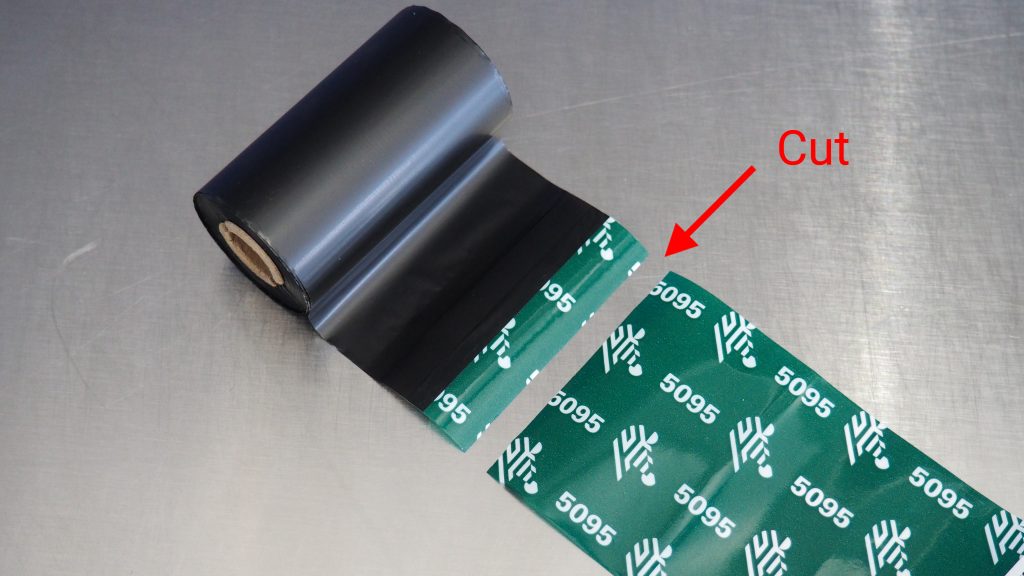
4. Prepare the transfer roll. Peel the wrap it comes in and unroll a little. Cut the wrap, leaving approximately 1cm still attached to the roll. This makes placement a lot easier.
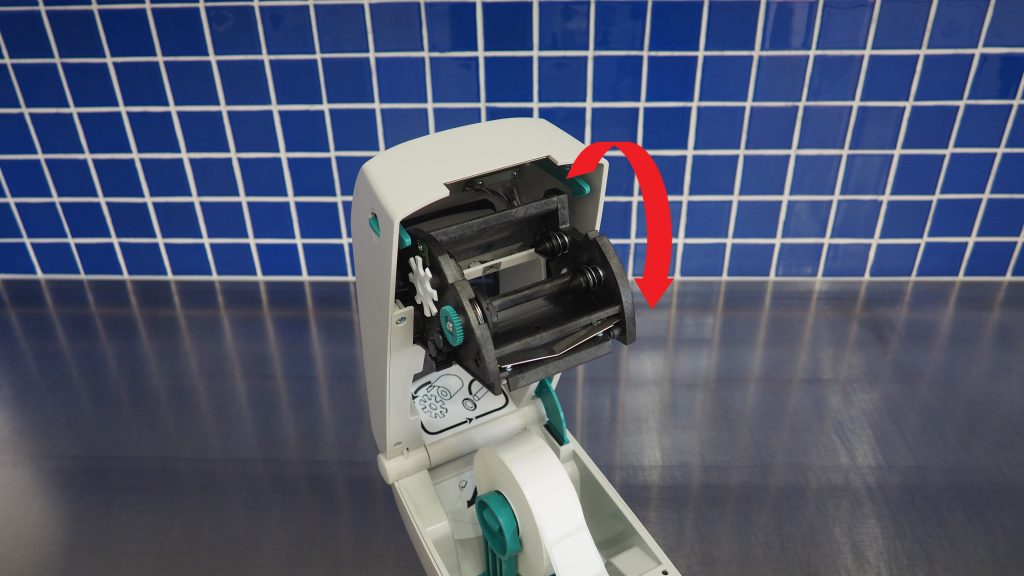
5. Flip the transfer carriage down. There are no tabs, you just pull it down.
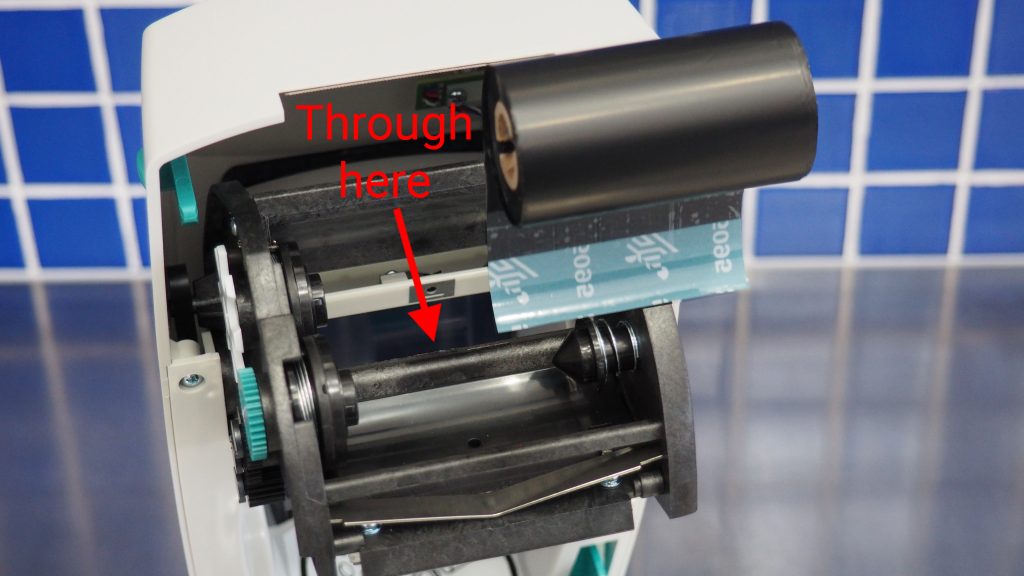
6. Insert the trimmed transfer roll through the back of the carriage. Place the transfer roll in the rear spool holder. You have to wrestle it in a little. Don’t worry so much about crinkling the film.
7. Take an empty roll and insert it in the forward spool holder. Make sure it locks into the tabs.
![]()
8. Pull the transfer film under the carriage and tape it to the empty roll. The matte side of the film (not the shiny side) should face you.
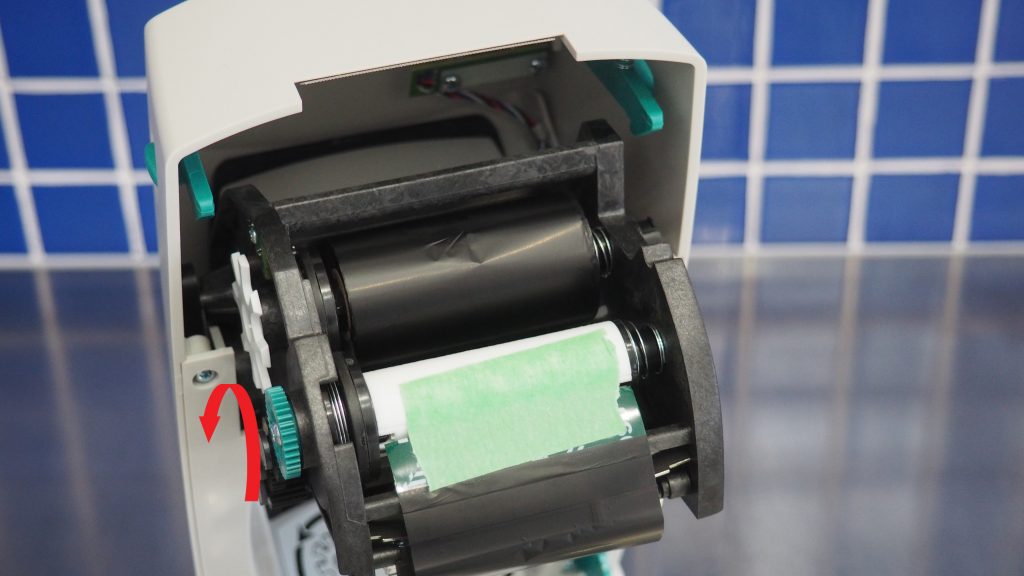
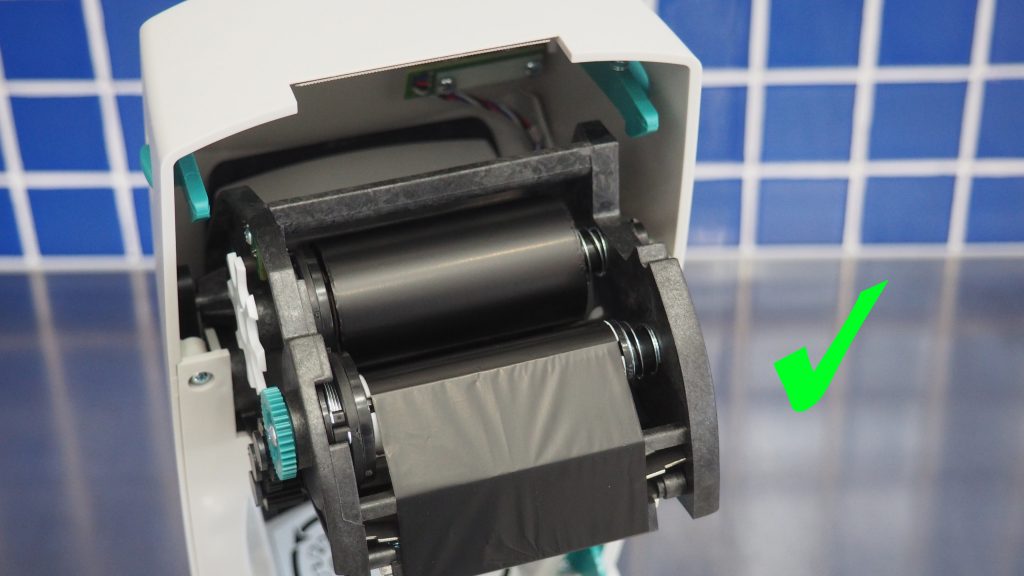
9. Use the thumbwheel on the left to remove the slack and tighten the film. Both rolls will self-centre as you do this.
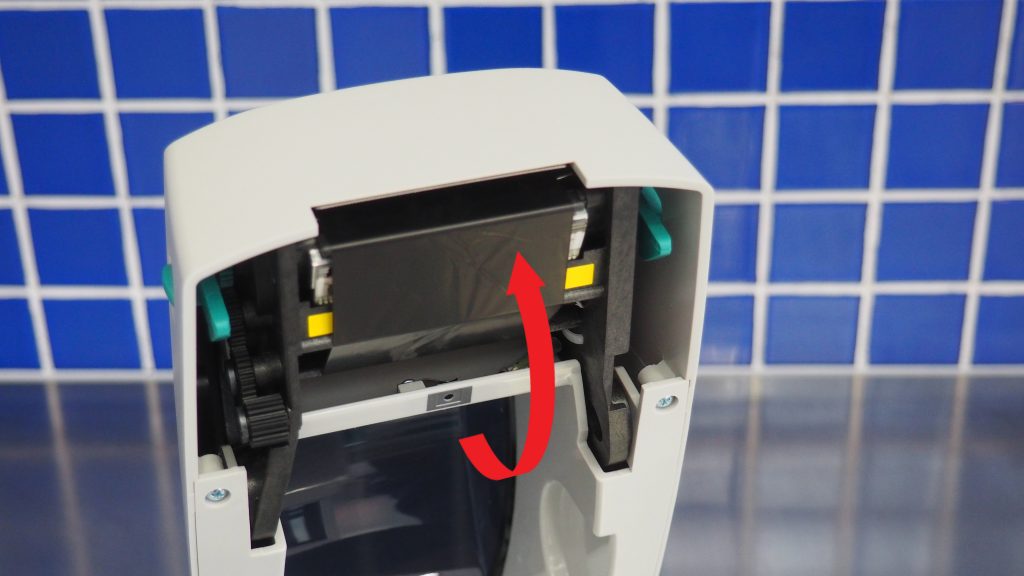
10. Flip the carriage back up.
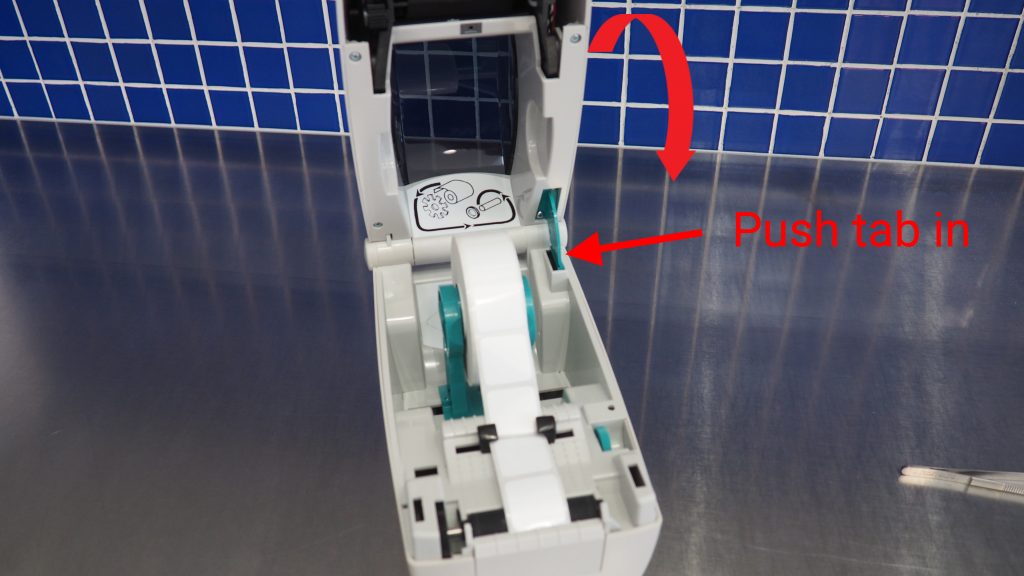
11. To close up the printer, push in on the green arm at the hinge. It locks as you open the printer, so push in to unlock it, to close the lid.
12. That’s it. Press the green button on the top right to advance a few labels and allow the printer to calibrate. It’s ready to go.