This guide will instruct you how to configure and/or restore accidentally erased configuration files for your TransLogger.
If you’ve used SteriReader to download files from your uSD, you should never need this guide to restore erased files.
Contents.
Part I. Making a backup.
Part II. Restoring configuration files.
Part III. Setting configuration files.
Part I. Making a back-up.
- Remove the uSD card from your TransLogger. Do so by gently pushing it in with your fingernail until it clicks, to release it. Remember to be careful as uSD cards are ceramic and may be damaged.

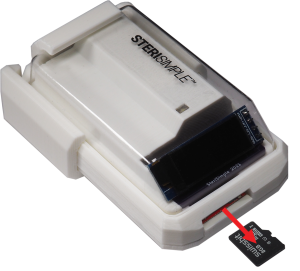
2. Use the uSD adapter and insert into your PC.
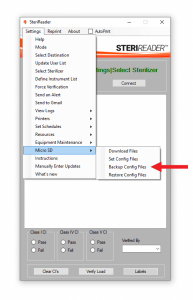
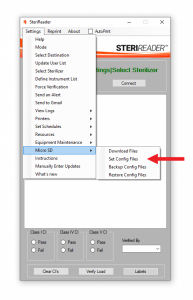
3. Go to Settings | Micro SD | Backup Config Files.
4. From Windows File Explorer, drag the drive letter of the uSD card into the TransLogger window (1). This tells the software where the uSD is located.
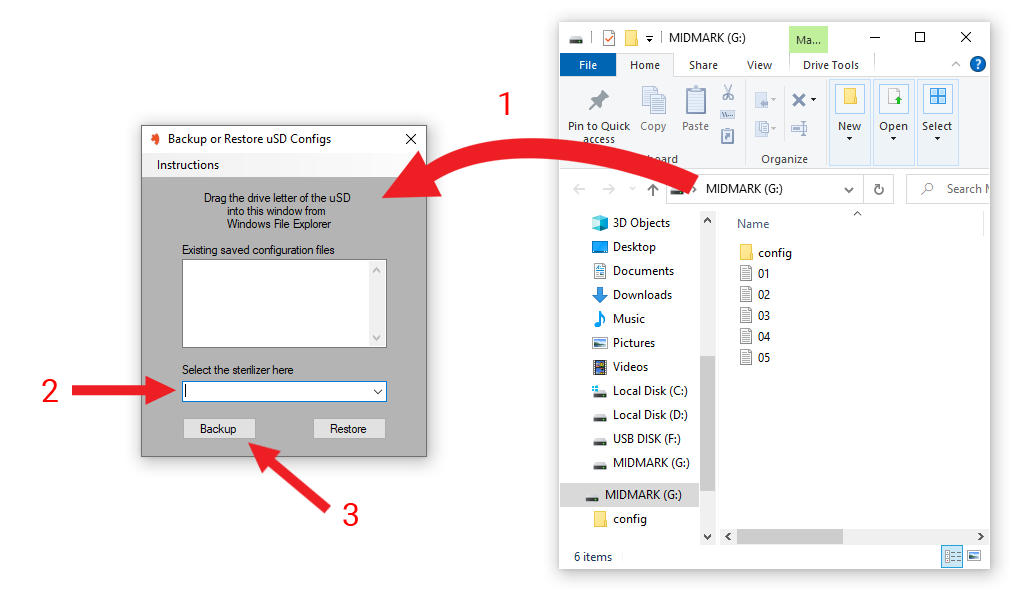
5. Select the sterilizer from the pull-down box. Select from “Sterilizer A,” “Sterilizer B,” etc.
6. Click Backup (3). The config files for this TransLogger will be stored on the harddrive of your PC.
7. Eject the uSD card from your PC before unplugging it.
8. Gently replace the uSD card into your TransLogger. Push in gently until it clicks.
Part II. Restoring configuration files.
1. Use the uSD adapter and insert into your PC.
2. Go to Settings | Micro SD | Restore Config Files.

3. From Windows File Explorer, drag the drive letter of the uSD card into the TransLogger window (1). This tells the software where the uSD is located.
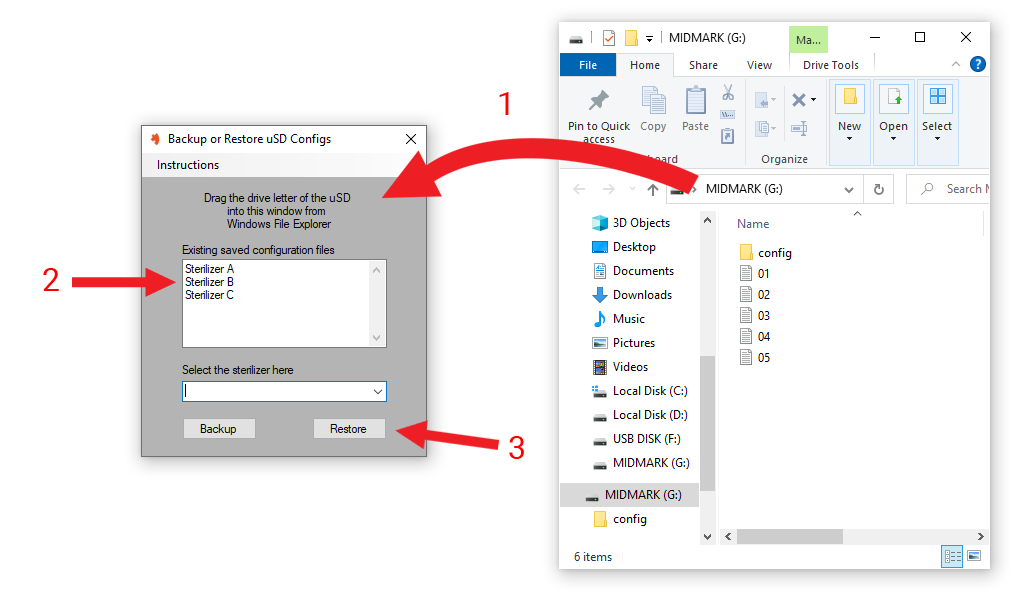
4. Click on one of the existing saved configuration files (2).
5. Click Restore (3). The config files will be transferred from your PC to the uSD.
6. Eject the uSD from your PC before unplugging it.
7. Gently replace the uSD into your TransLogger. Push in gently until it clicks.
Part III. Setting configuration files.
1. Go to Settings | Micro SD | Set Config Files.
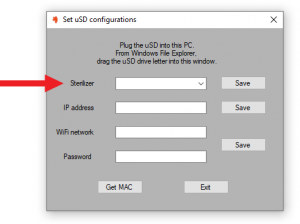
2. From Windows File Explorer, drag the drive letter of the uSD into the window.
3. CONFIG FILE. To set your TransLogger to read from a particular sterilizer, select the sterilizer brand from the pull-down box and click Save.
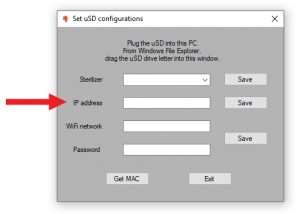
4. IP ADDRESS FILE. To set your TransLogger’s IP address, enter a reserved IP address (your IT pro will provide this) and click Save. The format of the IP address is “xxx.xxx.xxx.xxx”
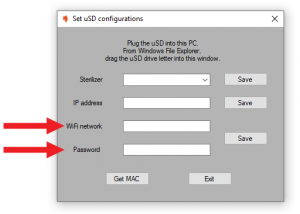
5. WIFI CREDENTIALS. To enable your TransLogger to communicate with SteriReader over WiFi, enter your WiFi Network name and password, then click Save.
6. Each time you alter one of these files, it is recommended that you make a backup, explained in Part I above.