This brief tutorial will show you the basic, day-to-day use of SteriReader.
- Activate an instance of SteriReader.
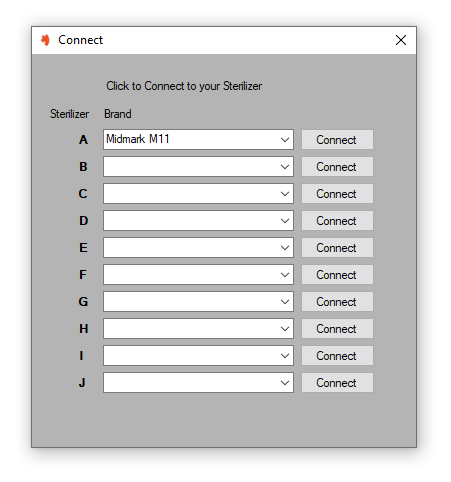
This screen will open: Click Connect to begin reading that particular sterilizer. You will hear the TransLogger beep, indicating a connection between the TransLogger and the software. Open one instance of SteriReader for each sterilizer you have. For example, if you have two Midmarks and one Statim, open SteriReader three times.
2. Below is the interface of SteriReader. This software is designed to stay open all the time (it will shut itself off once each month, to install pending updates). If it has been open all weekend and you are about to start work on a Monday morning, click Disconnect a few times – each time, you’ll hear the TransLogger beep, which will refresh its connection to the software.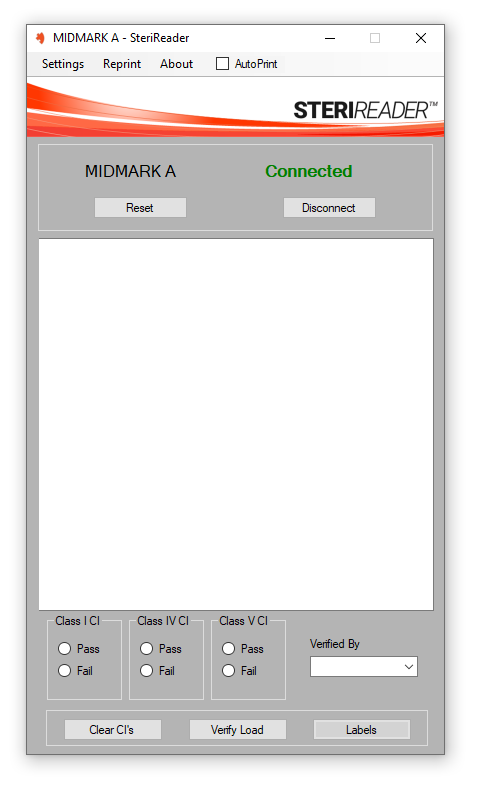
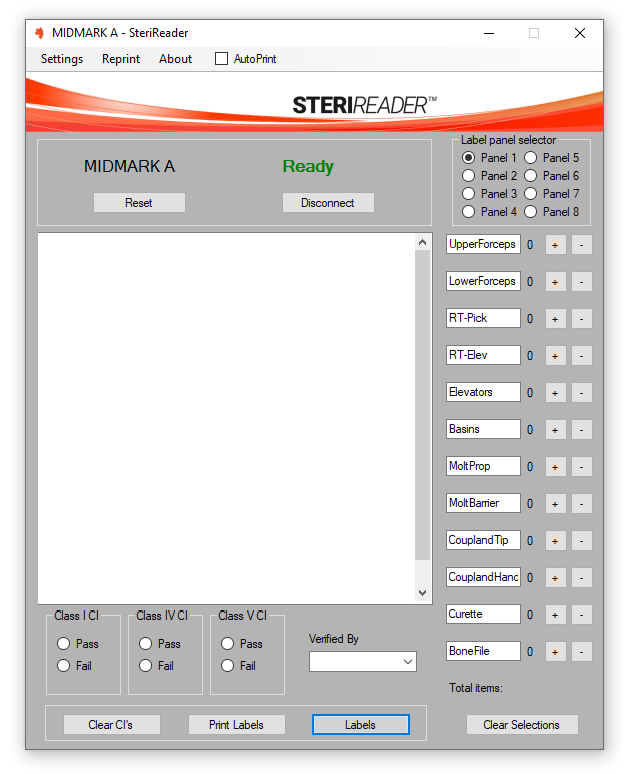
3. Before you begin a cycle, click the Labels button at the bottom. The interface will expand and prompt you to select your labels. There are 8 panels to choose from. Clicking “+” or “-” adds or removes, respectively, an item in the load. Click “+” multiple times if there are multiples of the same item. Clicking Print Labels (the bottom-middle button) triggers the labels to print and saves the list of labels as your contents list for that load. Click Labels again to reduce the size of the interface to normal and the Print Labels button will change back to the Verify Load button.
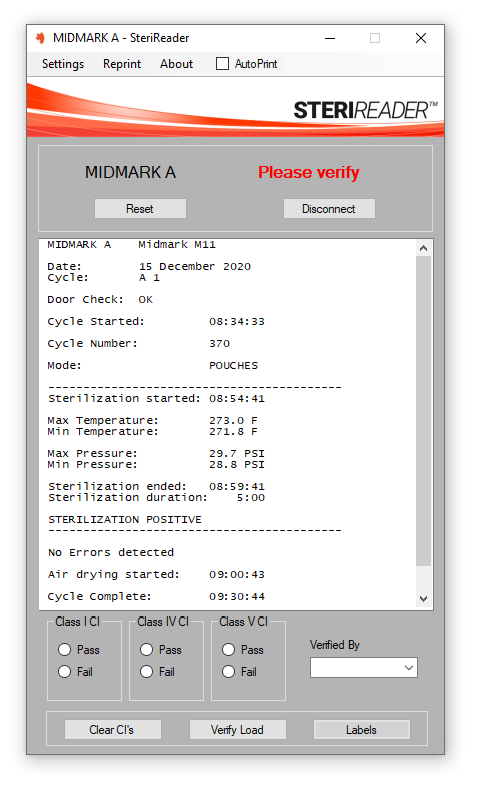
4. Begin a cycle at your Sterilizer. You will see this header information appear on the screen.
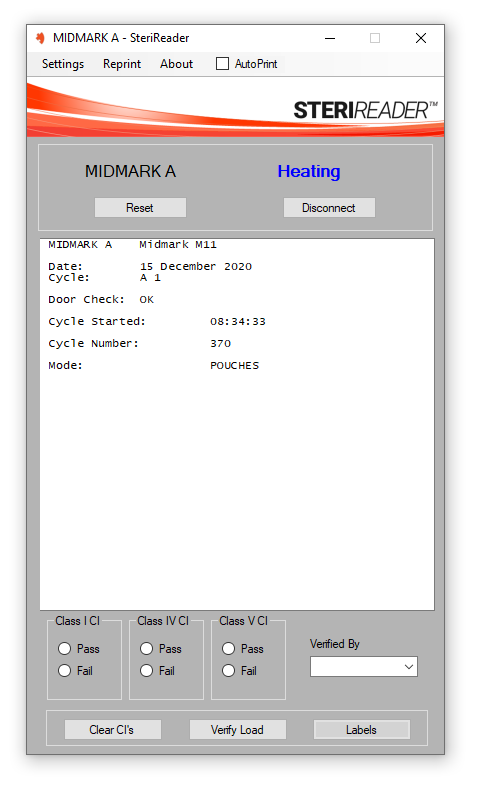
Please note, for some sterilizers such as Statims, StatClaves, Mieles, Lexas, etc, they will transmit their entire cycle log at the end of the cycle; nothing will appear on the screen at the start of a cycle. Also, for such sterilizers, the previous cycle number will be displayed on the TransLogger screen, since the current one is displayed at the end of the cycle.
5. When the cycle is complete, you will be prompted to verify the load. Indicate PASS / FAIL for your CI’s, select your name from the Verified By pull-down box and then click Verify Load. Clicking Verify Load adds the CI’s and contents to the report and saves it. If Auto-Print is checked (see the Menu Bar), the card copy will print to your selected printer (see Settings | Printers | Select Report Printer).
6. The interface will return to a blank state and indicate Ready to begin reading the next cycle.
7. If the software appears stalled when a cycle has clearly finished, click Settings | Force Verification. Sometimes, the last line of a cycle is not transmitted from the sterilizer, so this function forces the software to display its stored information.
8. You can view all saves logs under Settings | View Logs | Cycle Logs.
9. Click Reprint (on the Menu Bar) if you need to reprint any labels from the most recent cycle.
10. You can enter your labels at any time during the cycle by clicking Labels at the bottom right of the interface. The current contents list will be appended.
11. It is good practice to disconnect the cable from the TransLogger at the end of each work week, to give it a bit of a rest. (That is, if a cycle is not running when you leave.)
12. Please see Settings | Instructions to access other online short tutorials for use of the different functions of SteriReader.